Sunday, February 24, 2013

Growing up, tacos were something mom would make for my sister and me when dad was away. Although my mom's tacos didn't carry much heat, dad didn't/doesn't eat spicy food, and objected simply on principle. The tacos I knew as a child were always prepared with ground beef, served in consistently stale "Old El Paso" hard taco shells, and topped with layers of shredded Cheddar, diced tomato, chopped green leaf lettuce, and optional salsa and/or sour cream. They were deliciously messy, and the memory of them continues to make me nostalgic for mom's cooking (albeit in a different way than her Ossobuco and Blanquette).
I essentially stopped eating tacos from the time I left home for college up until this past year. I didn't do it consciously; it was just that it wasn't on my radar of favorite foods to prepare, nor was it ever an appealing entree choice when I ate out.
Last year, when I started to spend more and more time with my now fiance, Peter, we would often share memories of foods and meals that tugged at our stomachstrings. I learned of the dill pita chips his grandmother's maid would prepare for their lunches on the eastern shores of Maryland, and of the "ginger peachy skyscrapers" he enjoyed in seconds and thirds.
Eventually the subject of tacos came around, and Peter quickly drew my intrigue in the direction of the Baja-inspired soft-shell variety of taco layered with fish, cabbage, and crema. I knew I had to try them.
My first tacos probably probably made their way to our dinner table in April or May of last year. Since then, we have been eating them more or less weekly, with each iteration different from the last, and the majority of them fish.
Thanks to a rejuvenating beach vacation, during which we gorged ourselves on all things seafood - ceviche, stone crab legs, oysters, conch fritters, etc... - I ended this week inspired to try my refreshed hand at fish tacos. I took a cue from the mediocre tacos we tried seaside, and came home with just over a half pound of Mahi-Mahi. I have always stuck to pan-frying or having Peter grill the fish, I chose this time to go all out and beer-batter and deep-fry the fish. I created the batter with The Paupered Chef's ratio of 1 cup of flour to two teaspoons of salt to 1 beer. I used a can of beer, but hesitated to dump the whole thing into the flour and salt combo. I stopped with about two tablespoons of beer left in the can, which gave me the "goopy" consistency required.
Setting the batter aside, I got to work on rolling out my flour tortillas. Usually the store-bought tortillas work and taste just fine for our purposes, but with time and inspiration aplenty, I was happy to use the Simple Tortilla recipe from the King Arthur Flour website to create my own freshly-made taco shells.

With those cooked and staying warm in a low oven, I proceeded with a marinated cabbage topping using green cabbage, cilantro, lime juice, and touches of sugar and salt.
I also made up a mixture of avocado and tomato, again with a little bit of lime juice, salt, and some Cayenne pepper.
I then whipped a little bit of sour cream and lime juice together for the creamy component typical of most fish tacos.
I don't really like working with hot oil - the scars on my hands are a testament to that - so I only poured enough oil to come a couple inches up the side of my deep Dutch-oven. I then cut the fish into 1 to 2-inch wide fingers, dunked them into my ready-and-waiting batter, and gently placed them into the hot oil. I let them cook for about two minutes on one side, then flipped them with a spatula, leaving them for another 2 minutes before removing them to a paper-towel-lined plate.

With all the components ready, it was time to assemble - shell, smear of crema, crispy fish, marinated cabbage, avocado.
The tacos went down quickly and easily, and while they were worthy of every last bite, I commented (and Peter saw what I meant) that there was a missing flavor component. Perhaps too much acid cutting into the fattiness and tenderness of the fish. Perhaps not enough crema. Perhaps I'll just have to try again next week...

Friday, September 28, 2012

Lobster Mac and Cheese

It was a Wednesday evening following an 8-hour day of back-to-back meetings and an invigorating afternoon run in ideal VT autumn weather. I was feeling inspired and wandering the aisles of our Food Coop. I passed the meat counter, not feeling a spark of motivation by the various cuts of beef, pork, veal, lamb, and chicken that went by. Next came the fish and seafood and THE LOBSTER TANK. Bingo!
A couple of weeks back, Peter - yes my fiancee - and I spent a weekend up in Stowe, VT for the British Invasion car show that occurs annually at this time of year.


We stayed at the Stowe Mountain Lodge, which was quite nice indeed except for one minor flaw: their "fine-dining" restaurant, Solstice. I'll leave my critique of the establishment at this: if it has one redeeming quality, it is their lobster mac and cheese, which is cheesy, buttery, creamy, and full of hearty chunks of lobster meat, and accented with just the right touch of truffle.
OK, so jump ahead to this past Wednesday evening and my moment of inspiration. Seeing the lobster reminded me that we had had an intention of preparing the dish at some point during the week, after a failed attempt on Monday to purchase lobster. Thus, I stepped up to the counter and ordered their liveliest looking lobster, and here comes my moment of culinary shame. The kind fish monger inquired if I wished to have the creature cooked, and after stumbling over my words - the option came so out of the blue for me - I accepted his offer! Not that cooking lobster is really that hard, but how could I resist the no-additional-cost out of not having to go through the murderous task ahead of plunging the poor, delicious, little guy headfirst into a steaming pot?
Fifteen minutes later, I left the Coop with a cooked lobster and $40 worth of cheese and crackers. Arriving home, I was ready for a quick shower, and then started right in on dismembering my shelled friend, snacking of course on the little legs along the way. Forty-five minutes, 8 legs, and a glass of wine later I had a generous bowl-full of lobster meat, and was ready to get my pasta water and my cheese/Mornay sauce going.
For a Mornay sauce, and a Bechamel for that matter, I tend to apply a 1:1:1:1:1... rule. I get the Bechamel going by melting 1 tablespoon of butter, and then I add 1 tablespoon of flour and cook for 1 minute. Then I add 1 cup of milk gradually, stirring as I do so to prevent lumps from forming. I heat this until it just starts to bubble (probably longer than 1 minute) and then for the Mornay, I go ahead and add 1 cup of grated cheese.
In the case of my lobster mac and cheese, I actually doubled (this is an approximation as I naturally forgot to do any measuring whatsoever) these aforementioned quantities, and added a little wine in place of some of the milk. I then seasoned the sauce to my liking and added a touch of truffle oil (for lack of real truffle). I cooked about half a 1-pound box of cavatappi until al dente, drained it, and added the lot along with my chopped lobster meat to the Mornay. After stirring to make sure everything was evenly coated, I poured pot of cheesy, lobster-y, truffle-y goodness into a 10"x10" ceramic baker, topped it with a sprinkling of panko breadcrumbs, and popped it into a hot, 450-degree F oven for I'd say 10 minutes.
The dish came out piping hot, and after a good 2-hours of prepping (don't worry Peter all-the-while cheered me on and kept me motivated with E-Bay's selection of MGs for sale) I was ready to devour my good share of it. So alas there is no real recipe to accompany this post, but I assure you if you follow the general guidelines and use your own good judgement and taste, you too can have lobster mac and cheese in less than 2 hours and $60. 
Enjoy!
Oh yeah, I put our piping hot meal atop a bed of fresh Killdeer Farm spinach with just the slightly spritz of balsamic vinegar. Everyone needs a little bit of green in every meal:)

Sunday, March 25, 2012

Oxtail Paprika


It has been a week of unseasonable and "record-setting" March weather in Vermont, but the grey and the general rainy dreariness has reared its ugly head upon us this weekend. Without the promise of much outdoor recreational activity, we have opted to play the game where you say you're going to be productive and get a lot of things done indoors, but really your not accomplishing much of anything.
It wasn't until about 6:02 that we finally became a little more motivated and P is managed some cleaning, while I got an oxtail paprika on the stove!
I acquired the oxtail from the White River Junction Food Coop, which I had the good fortune of visiting when it was in the process of cleaning out freezers in order to prepare for the installation of brand new energy efficient ones. Everything in the freezers was 25% off, so I did a mandatory sweep of the cases, and stopped in front of the dwindled selection of Hardwick Beef. It was down to 4 pieces of beef shanks - with marrow bones - and two oxtails. Being partial to these cuts of beef, at first I grabbed all six pieces thinking we'd surely make use of them in quick fashion. However I then remembered the 1/2 a cow-worth of beef already sitting in the freezer, and so I put back two of the shanks and one tail and proceeded on my way before I could change my mind again.
Today's paprika is inspired by the fond food memories I have of Austria where we were treated to a homemade stock pot full of goulash.


2 tablespoons olive oil
1 1/4 lb oxtail (Hardwick Beef), cut into pieces
1 medium onion, diced
2 medium carrots, sliced
2 celery sticks, sliced
1 tablespoon tomato paste
10 sprigs thyme
3/4 bottle dry red wine
1 teaspoon paprika

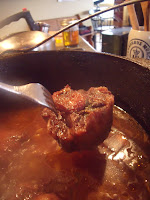
Heat the oil in a heavy dutch oven or other such pot. Add the oxtail pieces and sear on all sides. Remove the pieces of meat from the pot and add the vegetables, the tomato paste, and thyme. Cook until the vegetables soften then add the meat back to the pot and add the wine, the paprika, and enough water to cover the meat. Bring to a boil then cover and simmer until your meat is tender.

Hour 1

 Hour 2

Hour 3

Dinner


Sunday, March 18, 2012

Austrian Wine-Buying Trip: A Lesson in Food, Hospitality, and of Course Wine


Austria:


Terroir


Bread 


Pork


Pastry

Wine


And More Things Nice


Sunday, December 11, 2011

Thanksgiving 2011 - Well in advance for Thanksgiving 2012

I realize this post is a little behind schedule, but with a rather charged schedule at the end of 2011, the first day of 2012 has proven to be my first opportunity to finish up this post I began shortly after Thanksgiving.

Thursday, 24 November 2011,  marked a Thanksgiving to remember at the Bothe household. The affair this year, which occurs annually on the final Thursday in the month of November, brought out not only the elite of the Upper Valley, but also hosted several VIPs hailing from Boston, London, Paris and Orleans. The evening kicked off with top entertainment as guests mingled and enjoyed savory delights, including a full-flavored Fougeru, Mediterranean green olives and pistachios, as well as popped corn garnished with rosemary-infused olive oil and sea salt. 


Dinner was an elaborate buffet presenting neo-classical Thanksgiving fare. Le piece de resistance was an 18-pound turkey, which was prepared and roasted in the following manner:
The fresh turkey was removed from refrigeration about 1 hour before it was prepared, at which point the liver, neck and gizzard were removed. It was then given a gentle bath under cold running tap water and towel-dried before being rested on its back for a quick brush of butter and a seasoning of salt and pepper.


Next the bird was turned over, breast-side down, on an aluminum coated roasting rack set in a large roasting pan, and it was stuffed with a simple mirepoix of chopped carrots, celery, onion, lemon, and rosemary. Another brushing of butter and seasoning of salt and pepper left the bird ready for the oven, which had been preheated to a comfortable early roasting temperature of 425 degrees Fahrenheit.


 One cup of water was added to the roasting pan in order to provide moisture for the cooking process, and the pan and bird were placed into the oven. It was 11:30 when the bird went into the oven, and by 12:30 it had finished its initial roast so it was removed from the oven ready for the next stage of preparation.


This second stage commenced with the turkey being carefully turned over onto its back again with two pot holders- so as not to cause joint splitting to the bird or first-degree burns to the turner. The oven temperature was then reduced to 325 degrees Fahrenheit. The bird was returned to the oven and roasted for a further 2 hours until an instant-read thermometer inserted into the thickest part of the thigh read 170 degrees Fahrenheit. At this point the guests had not arrived, so the turkey was removed from the oven, and allowed to rest beneath a blanket of foil until it was ready to be carved.


The accoutrements to the turkey included house-made cranberry sauce and pan gravy, pommes de terre purees, Harvard beets, delicately spiced pearl onions, roasted Brussels sprouts, and of course a 100% house-made stuffing. The main portion of the dinner finished with a dressed autumn salad of kohlrabi, apple, carrot, dried cranberries, and walnuts. Although all the dishes were worthy of further explanation, for the sake of time, space, and convenience only the preparation method for the stuffing and gravy will be elaborated upon.
For the stuffing, a large loaf of home-made sourdough bread was chopped into one-inch cubes, and left to sit on an uncovered baking sheet over night. As the turkey was roasting the remaining components of the stuffing were prepared. First bacon was added to a hot pan and sauteed until it just began to turn crispy. Celery and onion were added and cooked until the onion turned translucent. This mixture was transferred to a bowl with the bread cubes, diced peeled and roasted chestnuts, and diced apple. Finally the turkey's liver was diced and flash-fried in a hot pan and added to the mixture.

The final step of the stuffing preparation was the adding of the liquid, which consisted of two whole large eggs, and 2 cups of freshly prepared turkey stock - this made for a less moist stuffing, but one that had lots of crisply toasted bread. The mixture was divided between two shallow baking dishes and baked for a total of 60 minutes.


The preparation of the gravy began with simmering the neck and giblets of the turkey in about 4 cups of water with a bay leaf for about an hour. Once the turkey finished roasting and was sitting beneath its blanket of foil the roasting pan was set over high heat, and deglazed with a half cup of white wine. The deglazed drippings were then removed to a fat-separating gravy boat and the fat was poured into a large saucepan set over medium high heat. An equal quantity of flour was added to the fat then the deglazed liquid and the hot turkey stock were added a cup at a time and the gravy was left to simmer to a rich robust sauce.